Restoring Data
When it comes to data recovery, you have the option to perform simple file and email restores using the Backup Applications.
However, for more advanced restoration tasks, such as VMs (Virtual Machines) and databases, administrators can utilize the Advanced button located in the top right corner to access the native backup application user interface.

Steps to initiate a restore
- Click on the Targets tab in the lower tile of the Backup Dashboard.
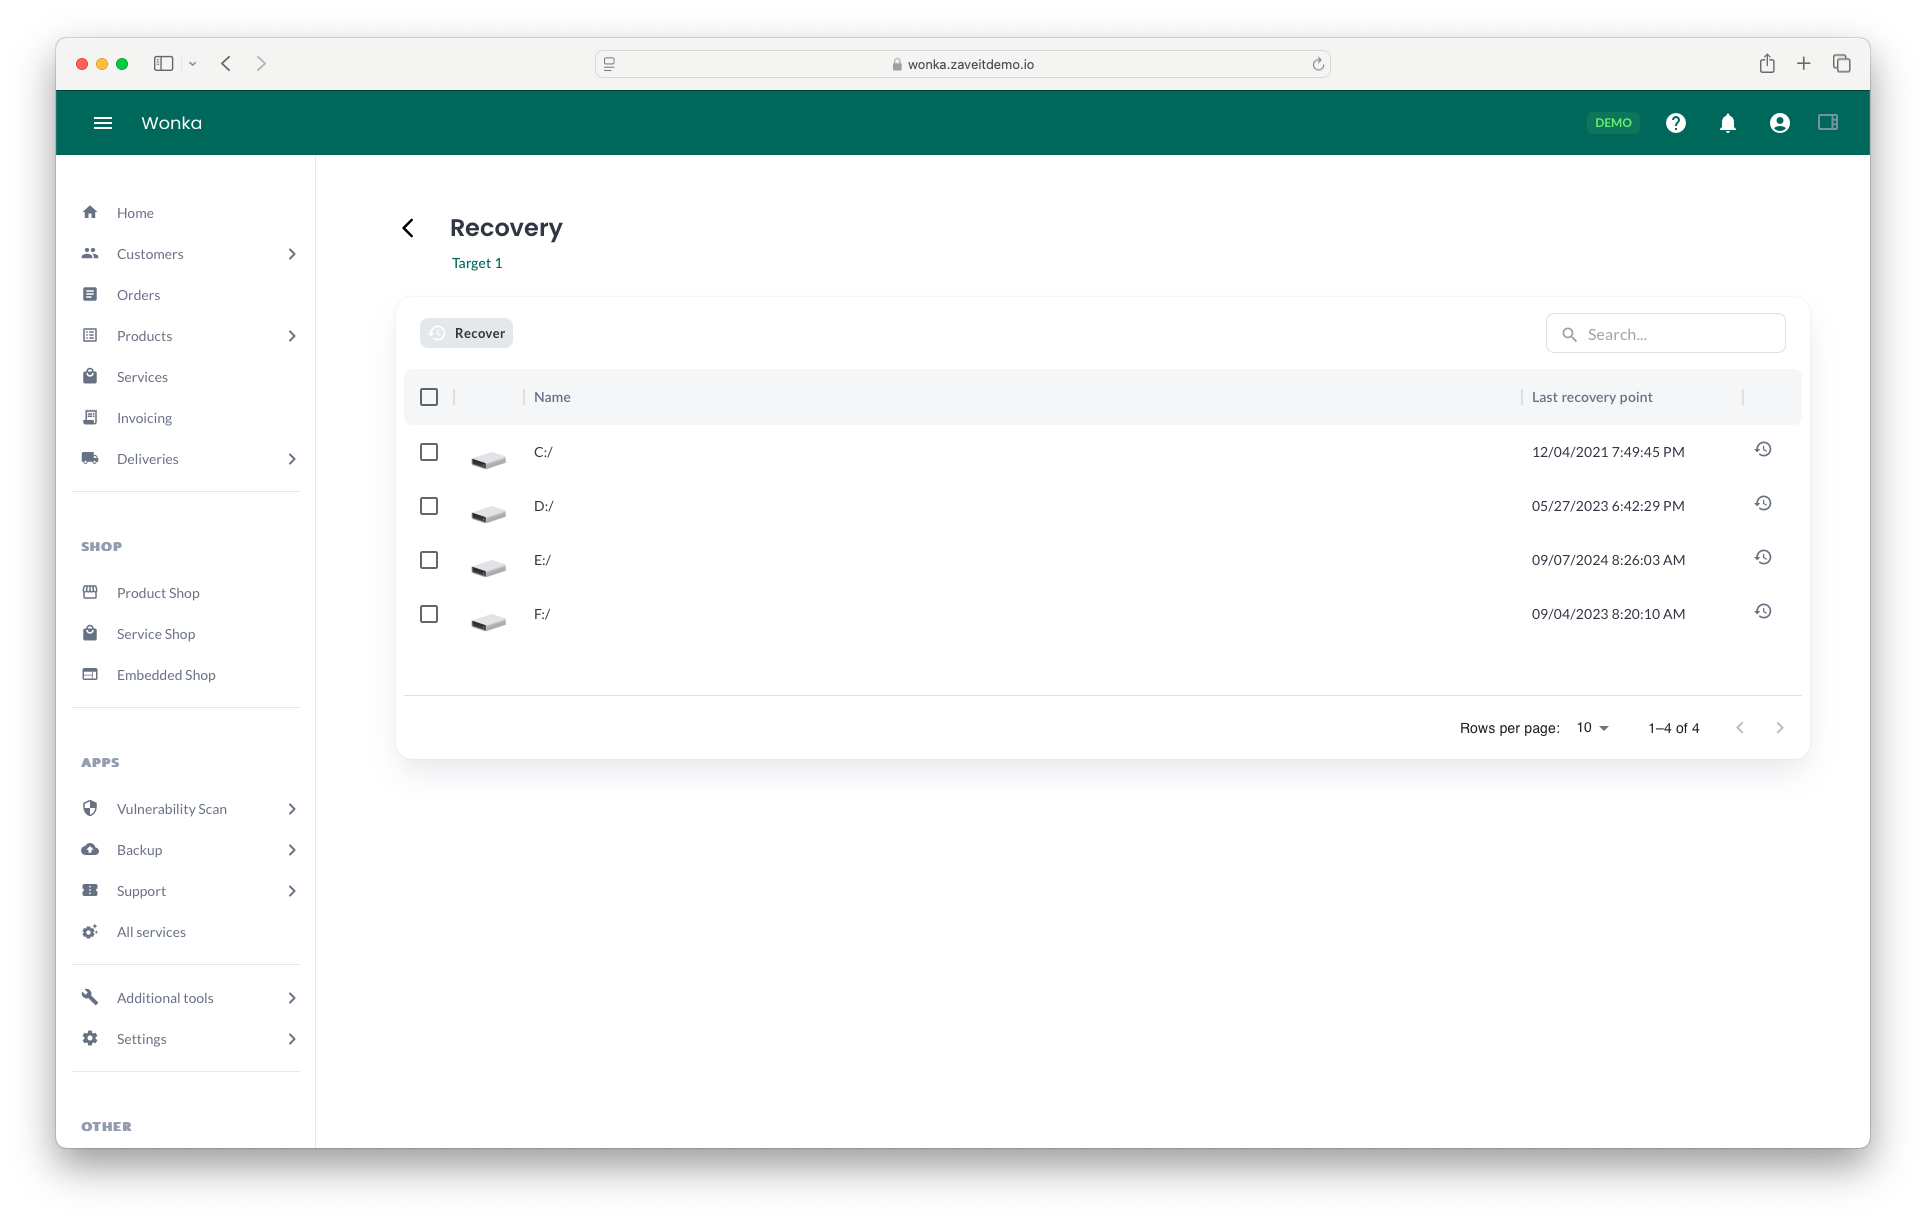
- Next, open the menu on the far right of the desired target (client) row and select Recover.
- First, you will need to specify what you want to recover and then click Recover.
- Second, you will be presented with recovery destination options:
- In-place recovery (Default)
- Different destinations (Only available through the Advanced menu)
- Download Item (Only available through the Advanced menu)
- Finally, after reviewing the selected options in a summary, click the Recover button to initiate the recovery process. You can monitor the progress and details in the Jobs tab if necessary.
Restoring data carries the risk of compromising or even losing data. It is advisable to consult with your manager, reseller, or vendor, unless you are a seasoned professional.
Advanced Management
For administrators requiring more advanced management features, such as complex recoveries involving databases and applications, we provide direct links to access the software or services setup within the Backup Application. Located in the top right corner, the Advanced button allows you to access external applications. Clicking on it will redirect you to the native backup application, where you can configure advanced settings and perform intricate operations.