Customers
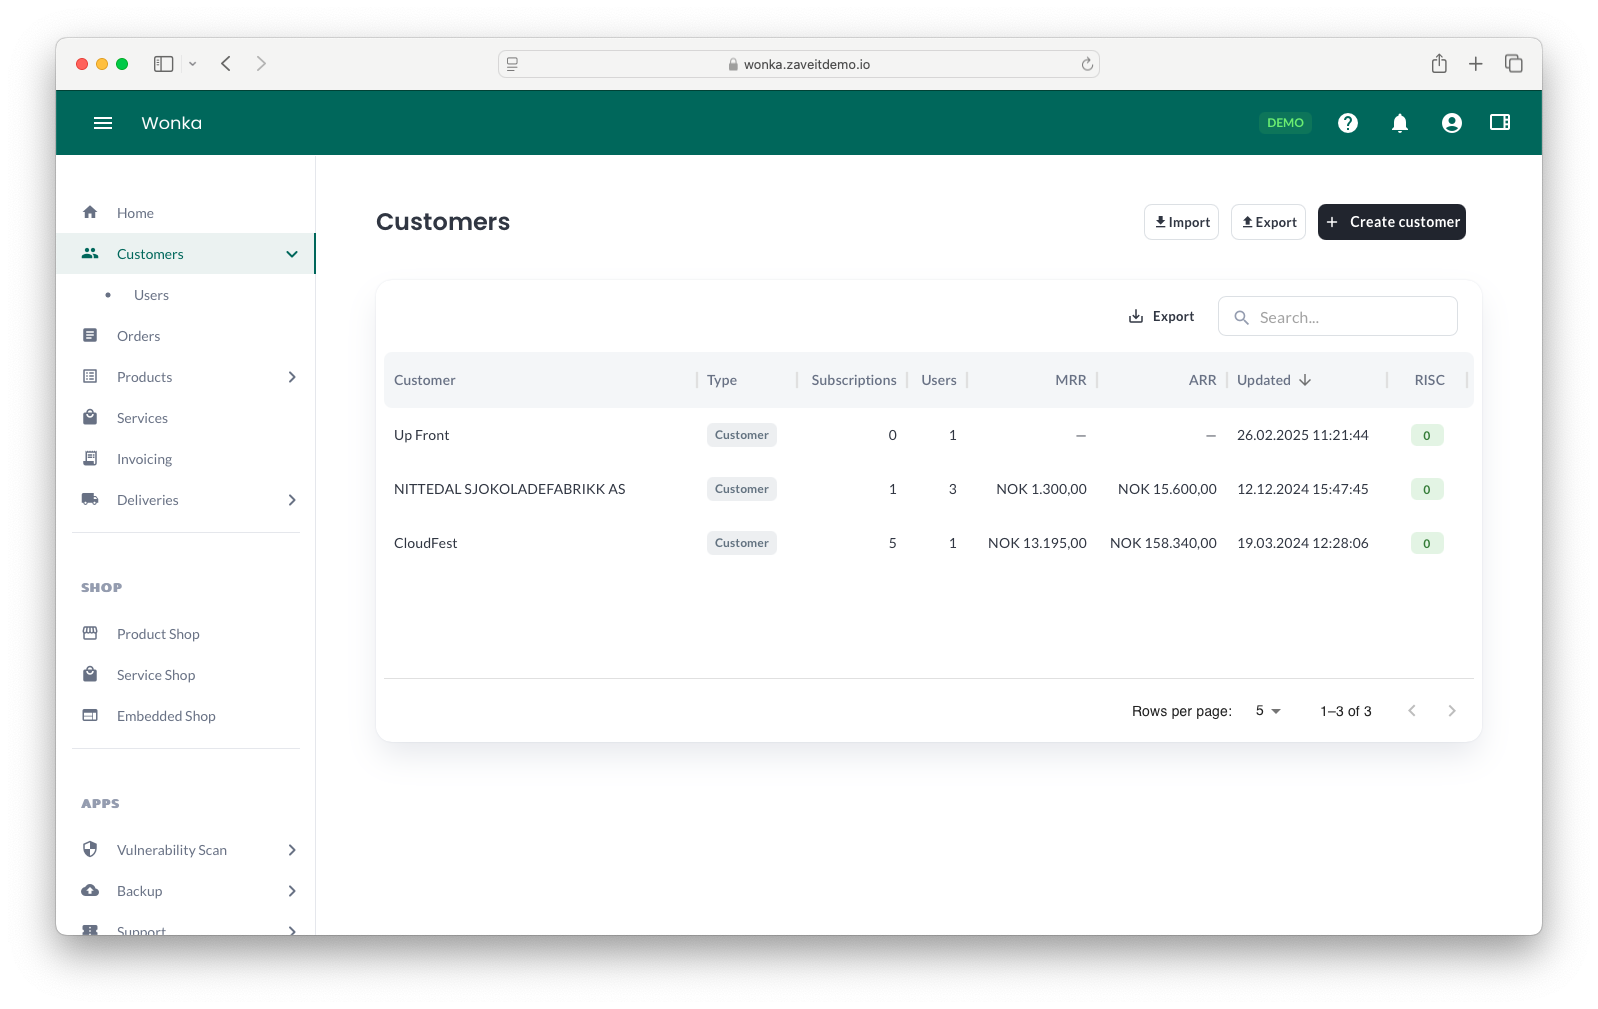
The Customers section in Account Management is where you manage customer accounts. Here, you can create and manage customers, add users, view orders, check subscriptions, and adjust customer settings.
To begin managing customers, navigate to the Customers menu. This page provides an overview of all customers, displaying key details such as subscriptions, users, MRR (Monthly Recurring Revenue), ARR (Annual Recurring Revenue), and last updated time.

Managing Customers
The Customers Table provides a structured view of all customer accounts. You can:
- Search for specific customers using the search bar.
- Sort and filter the table by column headers.
- View subscription and revenue details (MRR & ARR).
- Check customer risk scores (RISC).
Clicking on a customer opens the Customer Details Page, where you can manage users, subscriptions, and settings.
Creating a New Customer
To add a new customer manually:
- Click the + Create Customer button in the top-right corner.
- Fill in the required customer details.
- Click Create to finalize the process.
Once created, the new customer will appear in the customer list.
Creating a Customer via Search
Instead of manually entering details, you can search for a company in a public registry:
- Click Create Customer.
- Select the Search option at the bottom of the form.
- Enter the Company Name or Organization Number.
- Choose the correct company from the search results.
- Confirm or modify details and click Create.
The new customer will be added with pre-filled data from the public registry.
Importing and Exporting Customers
The platform supports bulk customer import and export, enabling seamless data management.
Importing Customers
- Click the Import button at the top.
- Select an import option (e.g., CSV Import).
- Upload a file or choose data sources.
- Review and confirm the data.
- Click Import to finalize.
Once imported, the customers will be available in the list.
Exporting Customers
- Click the Export button at the top.
- Select an export format (e.g., CSV Export).
- Choose the customers to export.
- Click Export to generate the file.
For third-party integrations, ensure correct configurations under Settings → Integrations.
Customer Details Page
Clicking on a customer opens the Customer Details Page, providing full account management.
The page contains the following sections:
- General – Overview of customer information.
- Users – List and management of associated users.
- Orders – View and manage customer orders.
- Subscriptions – Check active subscriptions and billing details.
- Settings – Customize customer-specific preferences.
Each section allows deeper customization and data management.