Payment Settings
The Payment Settings section allows you to define agreement periods and billing cycles specific to your service, overriding company-wide settings from Account Settings. You can configure flexible pricing structures that meet your business needs.
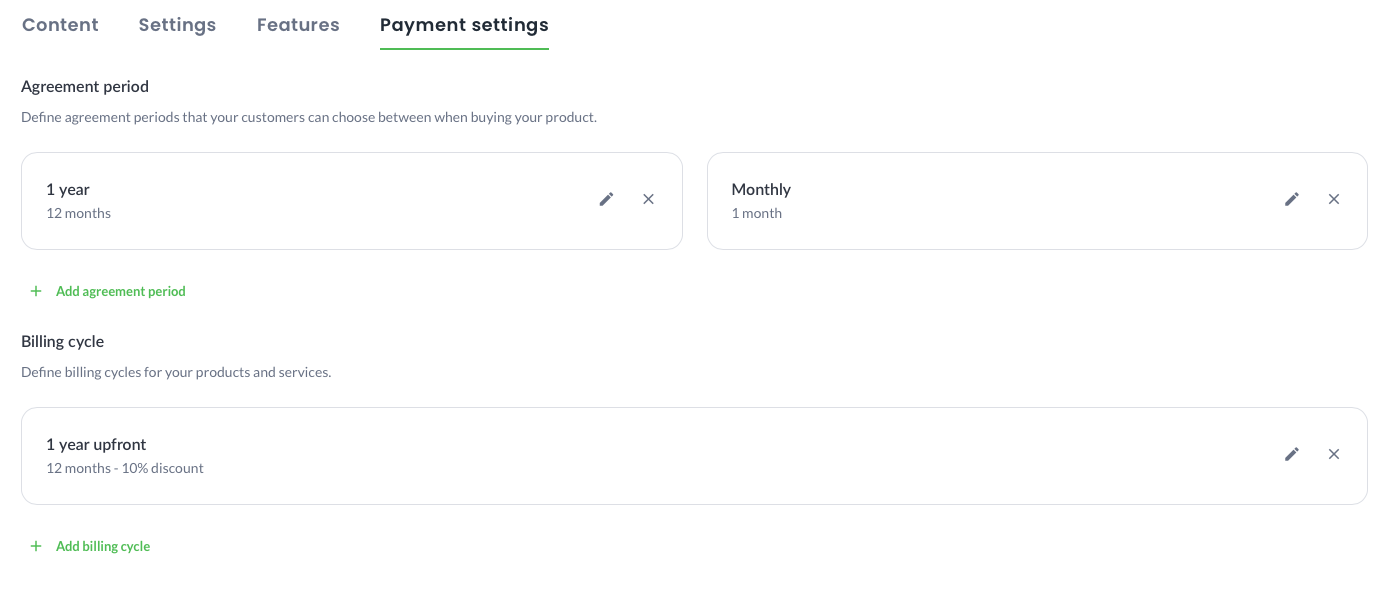
Agreement Period
The Agreement Period defines the contract duration options that customers can choose when purchasing your service. This can range from a monthly to a yearly commitment or any custom duration.
Steps to Add an Agreement Period
- Click on the Add Agreement Period button.
- In the Title field, enter a descriptive name for the agreement period (this will be visible to the customer).
- Set the duration of the agreement in months by selecting the appropriate value.
- Optionally, enter a discount percentage to provide an incentive for longer commitments (ranges from 0% to 100%).
- Click Save Changes to confirm the new agreement period.
Once added, customers will see the new agreement period as an option when purchasing the service.
Billing Cycle
The Billing Cycle determines how customers are billed for your service. This can be aligned with the agreement period or offer special pricing for upfront payments.
Steps to Add a Billing Cycle
- Click on the Add Billing Cycle button.
- Provide a Title to describe the billing period (this will be visible to the customer).
- Select the duration of the billing cycle in months.
- Set a discount percentage (if applicable) to encourage upfront payments. Discounts range from 0% to 100%.
- Click Save Changes to confirm the new billing cycle.
Customers will see these billing cycle options when selecting their preferred payment method.
Managing Agreement Periods and Billing Cycles
Editing an Agreement Period or Billing Cycle
- Click the Edit (pencil) icon next to the item you want to update.
- Modify the title, duration, or discount percentage as needed.
- Click Save Changes to apply the updates.
Removing an Agreement Period or Billing Cycle
- Click the Delete (X) icon next to the agreement period or billing cycle you wish to remove.
- Confirm the deletion if prompted.
Setting a Default Agreement Period and Billing Cycle
- Open the Edit menu for the Agreement Period or Billing Cycle.
- Enable the Default toggle to set it as the standard option for new purchases.
- Save the changes.