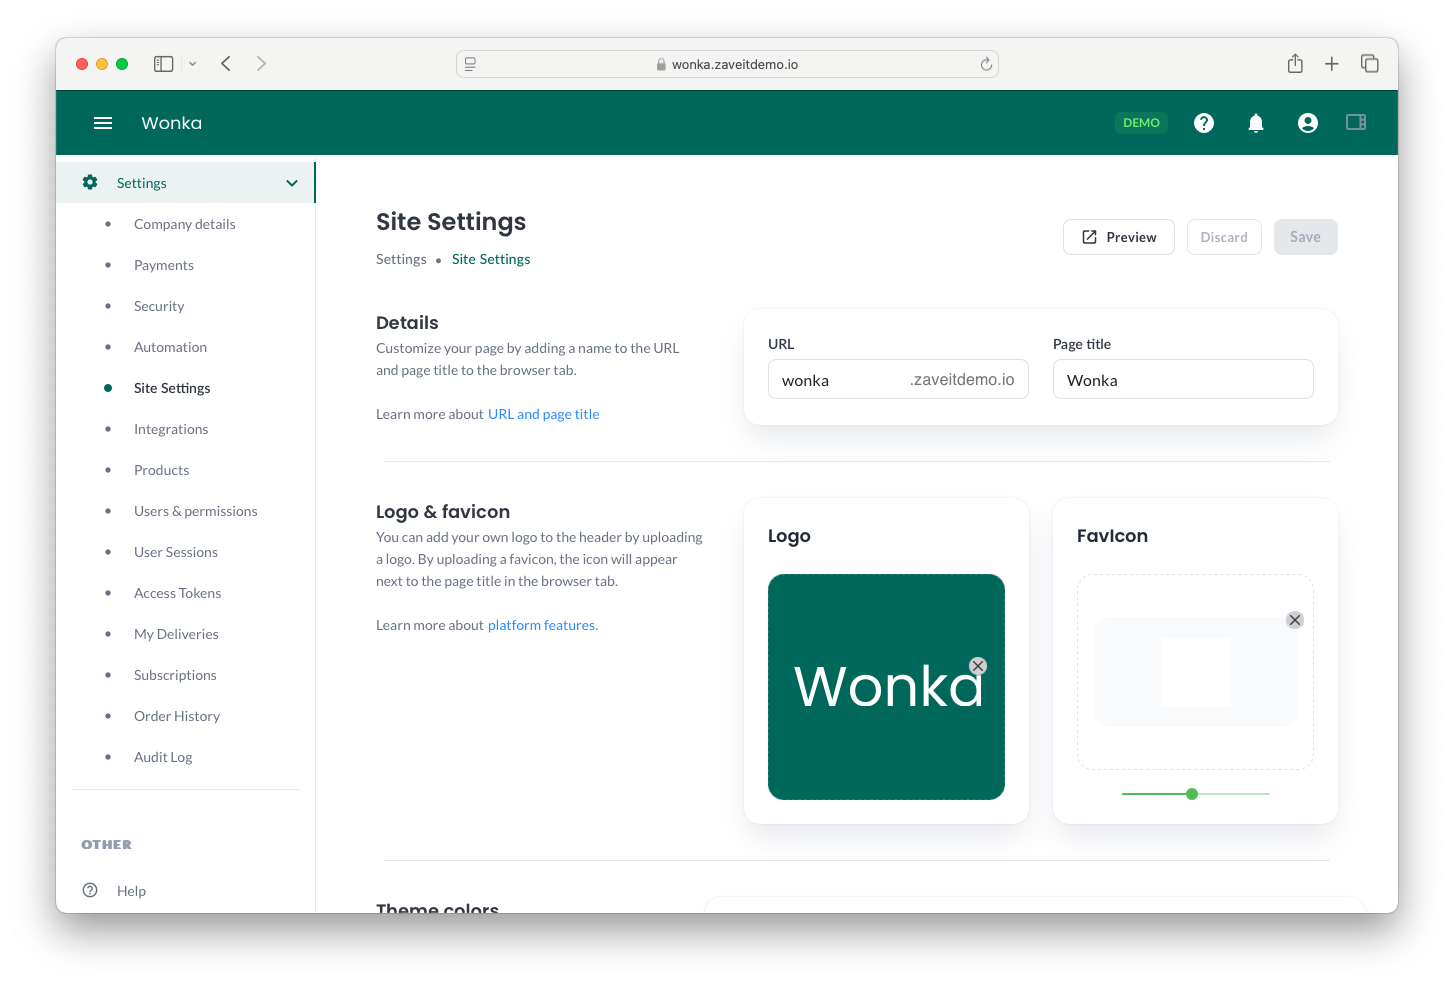
Site Settings
The Site Settings page allows users to customize the ZaveIT platform to align with their company's branding. Users can configure key elements such as the URL, page title, logo, favicon, theme colors, and enable platform-specific features.
These settings apply globally to the provider account and its end customers.
Available Configuration Options
1. Details
Under Details, users can:
- Customize the URL: Set the unique subdomain for your platform.
- Set the Page Title: Define the title that appears in browser tabs.
A best practice is to use your company name as the Site Name to maintain brand consistency. For example, if your company is called "Wonka," your URL will be wonka.zaveit.io.
2. Logo & Favicon
The Logo & Favicon section allows branding customization:
- Upload a Logo: This logo appears in the header and across the platform — including the customer portal, the service shop and the webshop.
- Set a Favicon: A small icon displayed in browser tabs.
Recommended sizes
| Image | Recommended size | Aspect ratio | Format |
|---|---|---|---|
| Logo | 600 × 60 px (max) | up to 10 : 1 | PNG with transparent background (or SVG) |
| Favicon | 64 × 64 px (also provide 32 × 32 and 16 × 16 if you can) | 1 : 1 | ICO or PNG |
- Use a transparent PNG for the logo so it sits cleanly on any header background color. Avoid baking a background color into the file — the configured header color can change.
- Use a clean square mark for the favicon, not your full wordmark — it has to remain legible at 16 × 16 px in a browser tab.
- Keep both files under 5 MB.
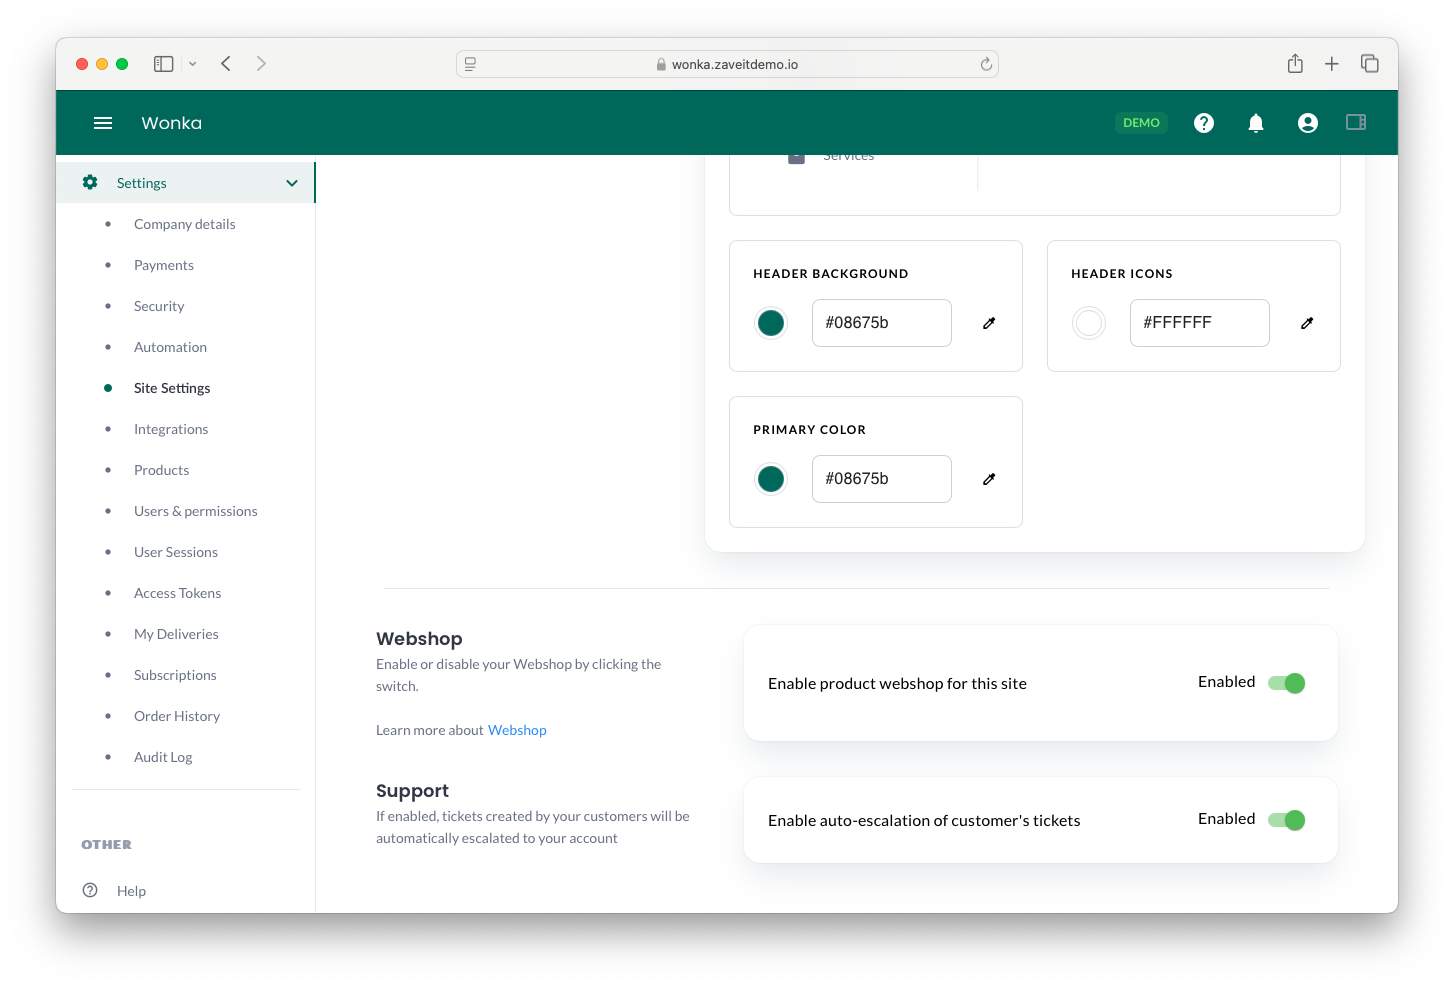
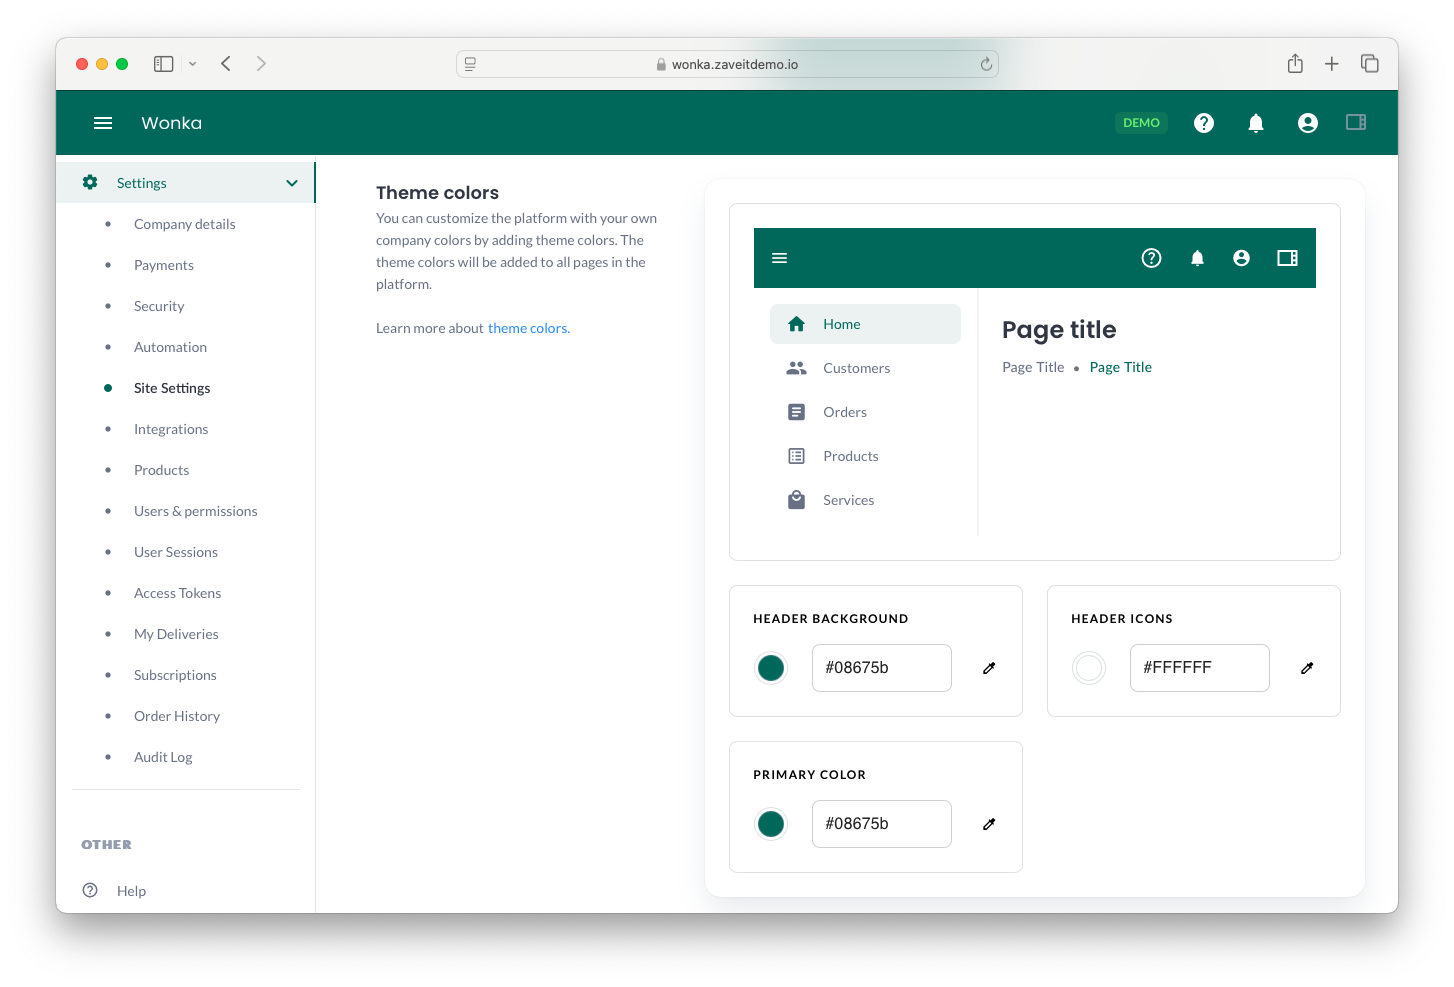
3. Theme Colors
Customize the platform's color scheme to match your brand identity. Available settings include:
- Header Background: The background color of the top navigation bar.
- Primary Color: The primary theme color applied throughout the platform.
- Header Icons: The color of icons displayed in the navigation bar.
Once updated, these colors will apply to all pages across the platform.
4. WebShop Settings
The WebShop settings allow users to enable or disable the product webshop for their site.
- Toggle Enable Product WebShop for this Site to activate or deactivate the webshop.
- Once enabled, customers will be able to browse and purchase products.
5. Support Settings
In the Support section, users can configure automatic ticket escalation.
- When enabled, customer support tickets are automatically escalated to the account.
- This ensures faster response times and improved support efficiency.
How to Save Changes
- Make your desired updates under Site Settings.
- Select Save to confirm the new settings.
- Click Preview to review changes of how it will look in services shop.