Domain
The Domain settings page lets you control which hostname customers use to reach your tenant. You can stay on a subdomain under the platform domain for the fastest setup, or connect a fully custom domain (FQDN) that you own so your brand appears in the URL instead of the Zaveit-hosted name.
Why use a custom domain?
When you use only the default platform hostname, links and the browser address bar show the platform provider’s domain (for example a *.zaveit… style host). A custom domain replaces that with a name you control, for example shop.yourcompany.com or portal.yourbrand.no.
Benefits:
- Your brand in the address bar: Customers see and bookmark your company, not the underlying platform name.
- Consistent identity: The same domain family as your website, email signatures, and marketing builds trust.
- White-label experience: The product feels like part of your ecosystem rather than a third-party tool.
A subdomain under the platform domain is quick to enable and still uses a predictable hostname, but the platform segment of the URL remains visible. A full custom domain gives the strongest branded experience because the entire hostname is yours.
Custom domain hostname requirements
A full custom domain must be a hostname with a subdomain, not the apex / root of your zone alone.
| Works | Does not work |
|---|---|
shop.example.com | example.com |
app.example.com | yourbrand.no (apex / root only) |
portal.yourbrand.no |
Enter the full hostname in the wizard (for example shop.example.com), including the part before your registered domain. example.com alone will not work. Use something like shop.example.com, app.example.com, or another subdomain you choose.
DNS targets, ACME hostnames, and verification values are tenant- and environment-specific. Always use the exact names and values shown on your Settings → Domain page in the product, not examples from documentation or other tenants.
What you configure here
You can either:
- Use a subdomain under the platform domain (no DNS changes at your DNS provider in most cases), or
- Set a full custom domain (FQDN) that you own. For a custom domain you must add DNS records at your DNS host and verify ownership before the change is saved.
How to set it up
Prefer video? Watch How to Configure a Custom Domain in ZaveIT for a step-by-step walkthrough (choose domain type, DNS, verify, and save). You can follow that instead of the written guide below.
Written guide
- Go to Settings → Domain.
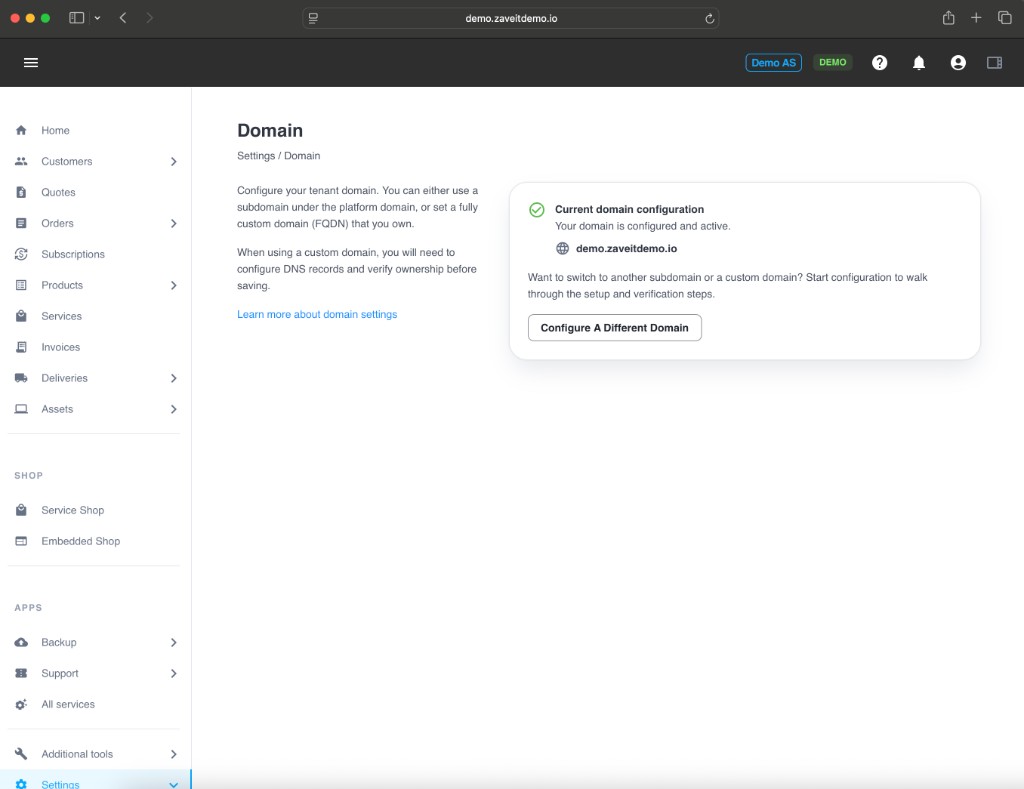
- If you already have an active domain and want to change it, use Configure a different domain to open the setup flow.
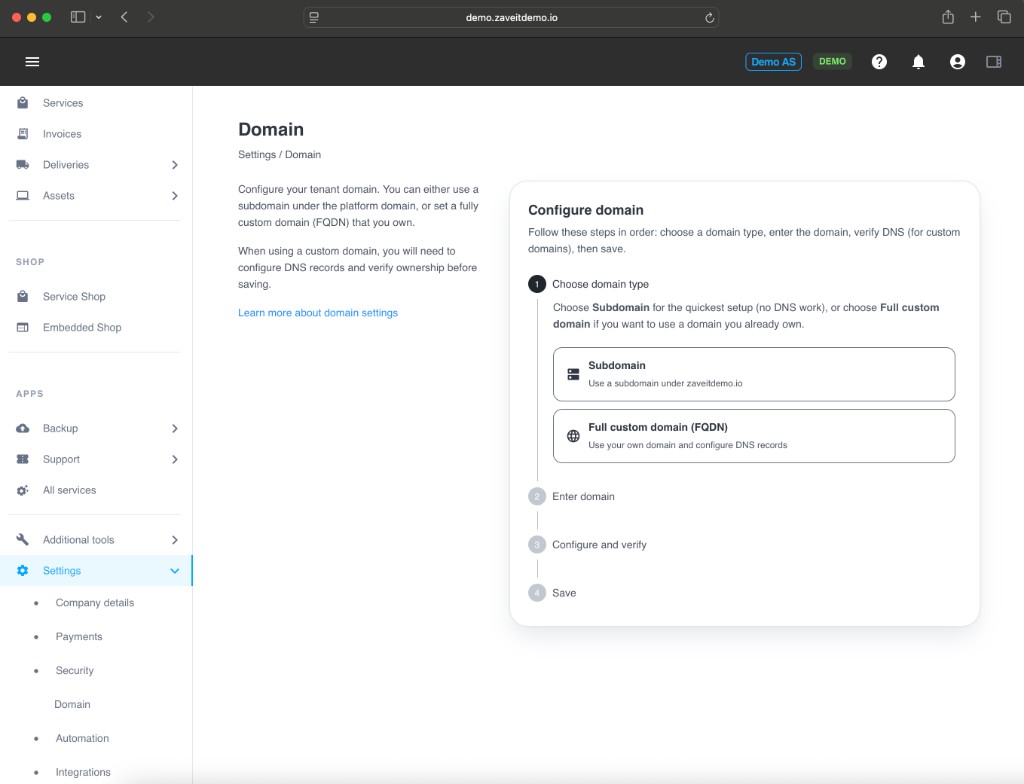
The flow is a short wizard. Complete the steps in order.
Step 1: Choose domain type
- Subdomain: Use a hostname under the platform domain. This is usually the fastest option and avoids DNS work at your registrar.
- Full custom domain (FQDN): Use a domain you already own. You will add DNS records in a later step.
Step 2: Enter domain
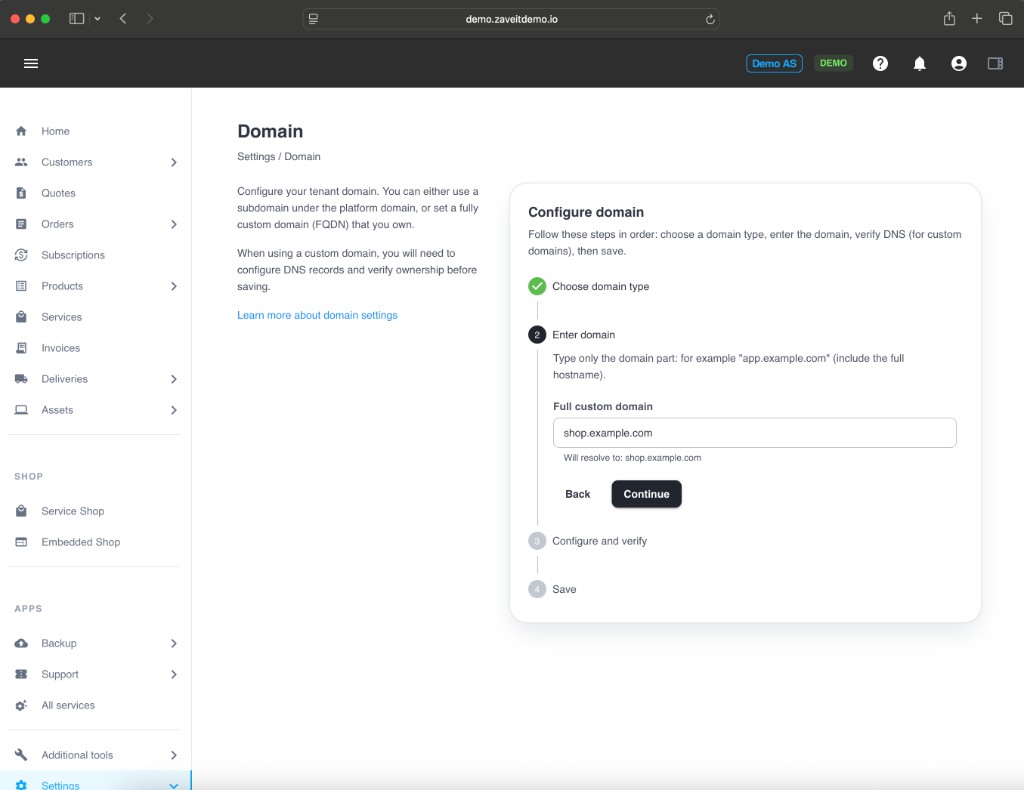
For a full custom domain, type the full hostname (for example shop.example.com). The UI shows how the name will resolve.
Use a subdomain of your domain, not the root alone. For example, use shop.example.com, not example.com.
Use Back if you need to change the domain type, then Continue when the hostname is correct.
Step 3: Configure and verify (custom domains)
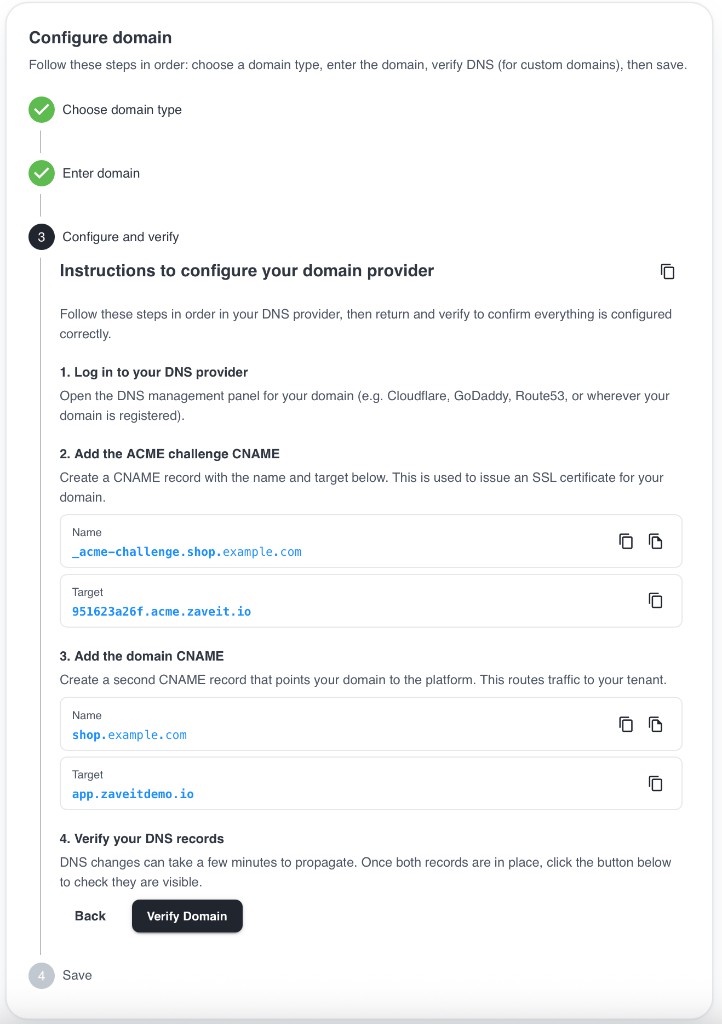
The product shows instructions for your DNS provider. Typical steps:
- Log in to the DNS management for your domain (Cloudflare, GoDaddy, Route 53, or wherever the domain is hosted).
- ACME / certificate challenge: Add the CNAME the page shows for certificate issuance (often a
_acme-challenge…name). Copy the name and target from the UI. - Traffic / routing CNAME: Add the second CNAME that points your hostname (for example
shop.example.com) to the platform endpoint shown in the UI. - Wait for DNS propagation (often a few minutes, sometimes longer), then click Verify domain.
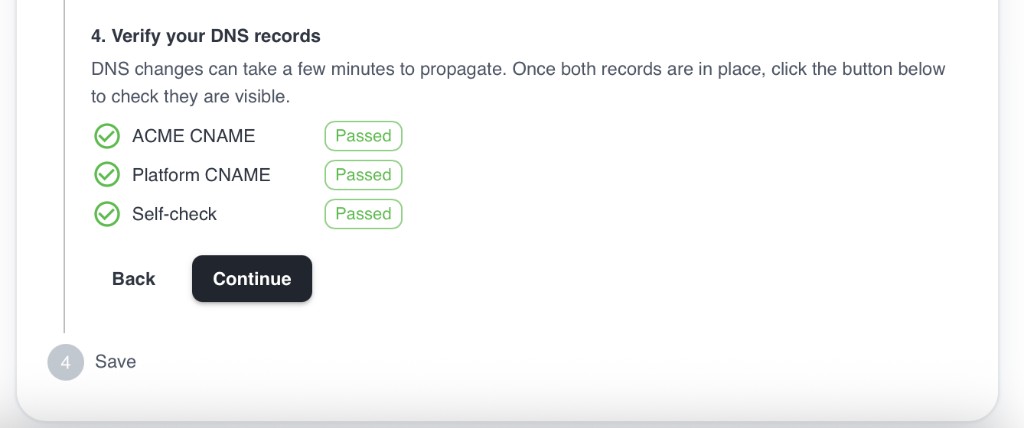
When verification succeeds, you see checks such as ACME CNAME, Platform CNAME, and Self-check marked as passed. Click Continue.
If verification fails, double-check record names, targets, and TTL; confirm you used a subdomain hostname (not the apex), then try again after a short wait.
Step 4: Save
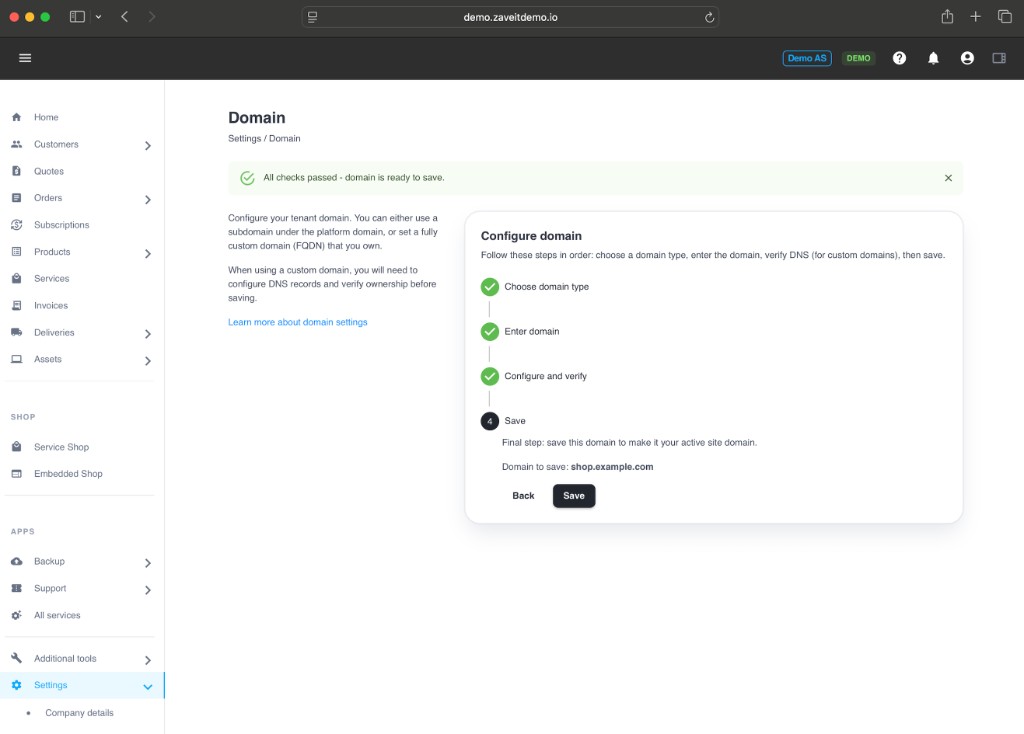
When all checks pass, the wizard shows that the domain is ready to save. Confirm Domain to save (for example shop.example.com), then click Save to make it your active site hostname.
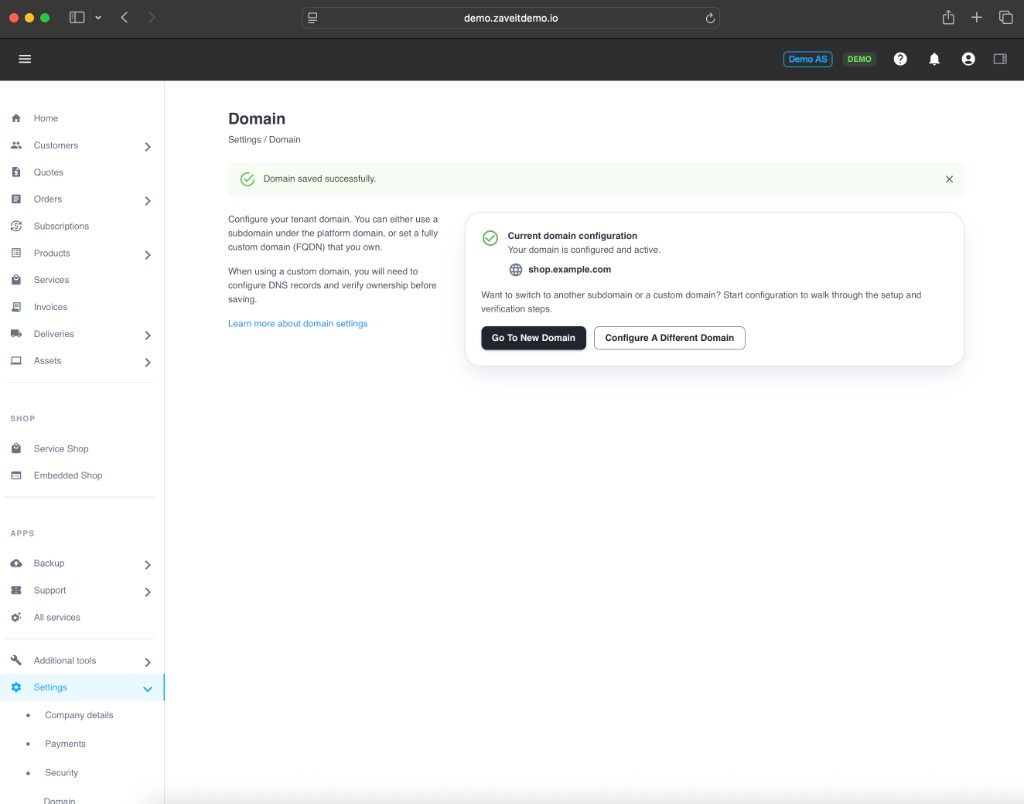
After saving, the Domain page shows your active hostname (for example shop.example.com). You can open the new domain with Go to new domain or start again with Configure a different domain.